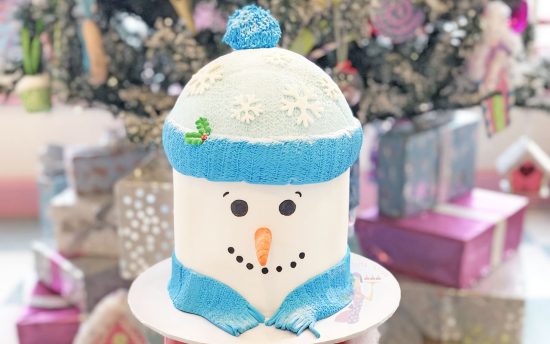
Welcome to our final blog post of 2021 🙂 Another year been and gone and I know we’re all looking forward to winding down for a few days before 2022 begins! We’ve been debating which cake to turn into a blog post this month but this one received lots of compliments when it was out on display for students so it made the most sense! Hope you enjoy x
Here’s the list of equipment we used for this cake:
- 6″ round cake
- Approx 1.5kg white Renshaw extra fondant
- Fondant rolling mats
- Large rolling pin
- Sharp edge smoothers
- Sugarflair colours
- Knit moulds
- Pink sugarcraft mat
- Small rolling pin
- Sharp knife
- 6″ round cake card
- Palette knife
- Scribe & Dresden tool
- Cocktail sticks
- Fine paintbrush
- Edible matt black paint
- Orange fondant
- Edible glue
- Snowflake plunger cutters
- Holly & berry sugar pipings
- White diamond dust for finishing
Everything you need can be found here in one place on our website!
The quantities used in this tutorial are for a 6″ round x 5″ tall cake! If you’re making a smaller or larger cake, just scale down as necessary.
Start by stacking, filling and crumb coating your cake and we’ll show you how to cover it in fondant!
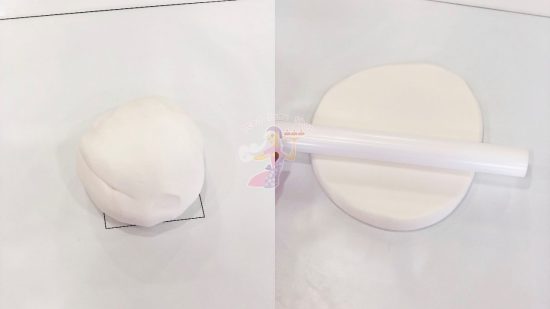
Grab 800g of Renshaw Extra White Sugar Paste and knead until soft & warm. Pop it onto the bottom sheet of your fondant rolling mat and start rolling (without the top sheet on) into a circular shape. Once it’s semi flat, lay your top sheet on and continue rolling out to size.
Peel back the top layer of your rolling mats to reveal super smooth fondant!
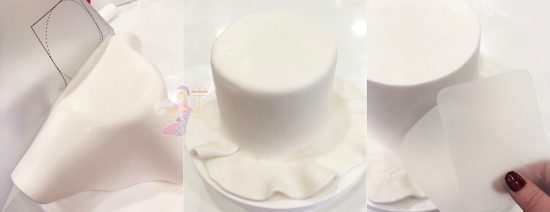
Lay the fondant over your cake and peel off the bottom layer of your rolling mats, then smooth down and trim off any excess. Use our super Sharp edge smoothers to get nice finish on your cake! If you’ve never used them before, we have a quick video here.
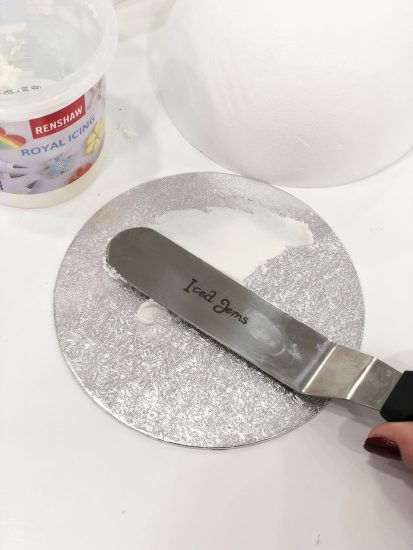
I used a 6″ half sphere cake dummy for the hat but you could easily make it out of cake! Whichever method you choose, you’ll need a thin board the same size as the dummy/cake above.
Spread a thin layer of royal icing or buttercream onto the card to help give your dummy something to stick to.
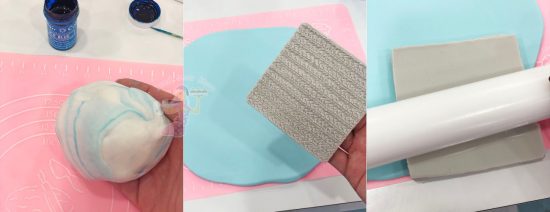
Knead 250g of white fondant (or any colour of your choice!) and add some Sugarflair paste into it – I used Ice Blue for this particular project as it felt festive. Sugarflair colours are super concentrated and don’t affect the consistency of your fondant, buttercream or royal icing! Cannot rave about them enough 🙂
Roll it out into a circle – roughly 5mm thickness – on a sugar craft mat to about 7/8″ diameter, lifting occasionally to ensure it doesn’t stick. Place the cable knit mould onto the fondant and gently roll a rolling pin over the top (this really helps you to achieve a consistent textured finish). Repeat this process until all the fondant has been embossed.
Apply a bit of edible glue or piping gel to your dummy and very carefully lay the fondant over the top. You’ll need to be careful not to use your hands too much to squish it down as you may affect the final pattern. Trim off the excess – this doesn’t have to be neat as we’re going to cover it with a band! Place this on top of your cake.
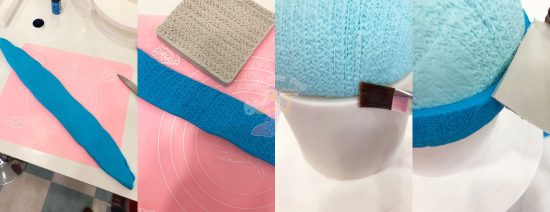
Knead another 250g of fondant and tint it a darker shade or another colour than the main part of the hat. Roll out into a long 2″ deep strip of fondant – roughly 7/8mm thick until you have enough to wrap around the circumference of your hat. Use your cable knit mould again to emboss the fondant.
Paint a little edible glue or piping gel around the join where the hat meets the cake and wrap the fondant around it. If you want to tidy up the join of the band, you can use your fingers to smooth it out (you may have to just go over this section with the mould again to bring back the pattern).
Apply a gentle pressure around the edge of the band using the mat before it has a chance to dry out.
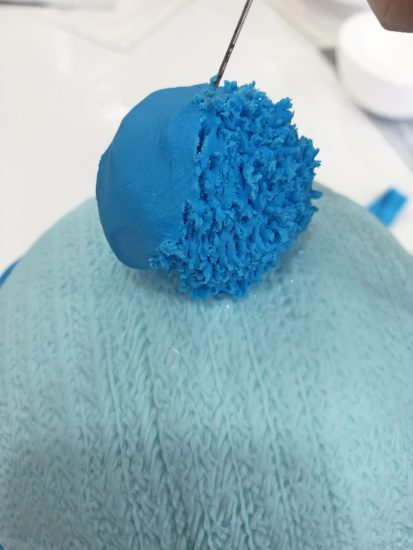
I had quite a bit of excess from my band, so I used 50g of the fondant to create a little bobble piece for the hat! Simply roll it up into a ball and place it in the centre of the hat – I recommend pressing a cocktail stick into the top of your cake first to secure it down. While the fondant is still soft, grab your scribe tool and use small, gentle upward scratching motions to create the fuzz effect! It may look a little odd at first but once you’ve done the whole piece, it’ll look super effective 🙂
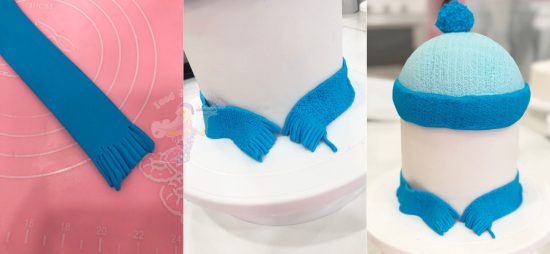
Roll out another strip of fondant as you did for the band but this time make the scarf a little thinner – approximately 4mm should be thick enough! Use a sharp knife to cut tassels about 1 inch into each end of your fondant stripe. Apply a little edible glue or piping gel to the bottom few inches of your cake and wrap it around loosely rather than flat against it to give it the scarf a little more shape!
I will forever love making novelty cakes above all else as things like this are a great way to cover up any untidy edges on your cake haha!
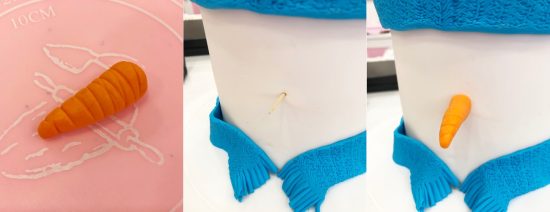
For the Snowman’s nose, roll up a small amount of orange fondant into an almost cone shape and use a dresden tool to create little lines in the carrot for a more realistic finish. Use a cocktail stick to secure into place or you could glue the carrot down flat against its face.
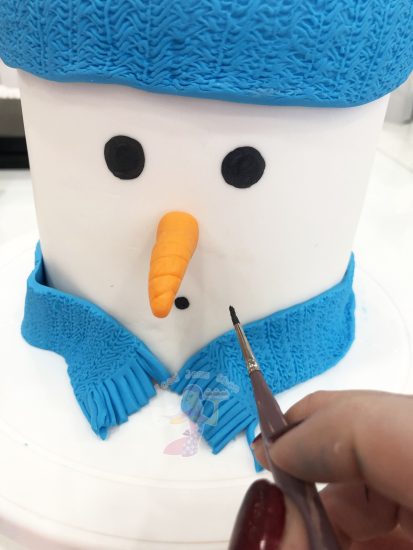
Paint some large round circles for the eyes using edible black paint and some fine paintbrushes. Then just below the nose, paint some smaller black circles for the mouth. Add some little eyebrows to give your snowman a bit more character!
I added some chunky snowflake fondant pieces onto the hat for a final touch and dusted with some diamond dust for the illusion of snow 🙂 I also finished it off with one of our holly & berry sugar pipings!
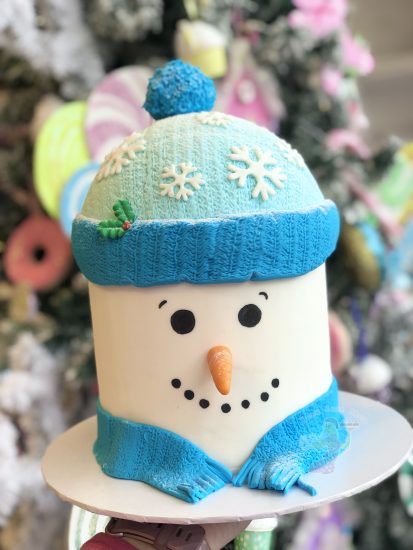
We really hope you enjoyed this little tutorial for our snowman cake! Everything we used for it can be found here!
Wishing you a very Merry Christmas and Happy New Year from all of us here at Iced Jems! 🙂 xx