

I had this idea in my head for a while and was so glad it actually worked! As soon as the pretty flan cases arrived in my shop I know they were meant for great things! 🙂
This cheesecake mixture is light and mousse-like, making it the perfect consistency to set into shapes like this. It get’s it’s flavour and colour from the Strawberry Jelly added, but you could change this for any flavour jelly.
[fancy_header]You will need (makes 6 individual cheesecakes):[/fancy_header]- 100g Unsalted Butter
- 175g Digestive Biscuits
- 150g Cream Cheese
- 135ml Evaporated Milk
- 2/3 Pack of Strawberry Jelly (Raspberry will work too)
- Red Food Paste Colouring
- Red Polka Dot Flan Cases (£1.50 for a pack of 24 from www.icedjemsshop.com)
- Heart Shaped Cutters (mine were 4.5cm and 5.5cm diameter) (£1.50 for a set of 5 from www.icedjemsshop.com)
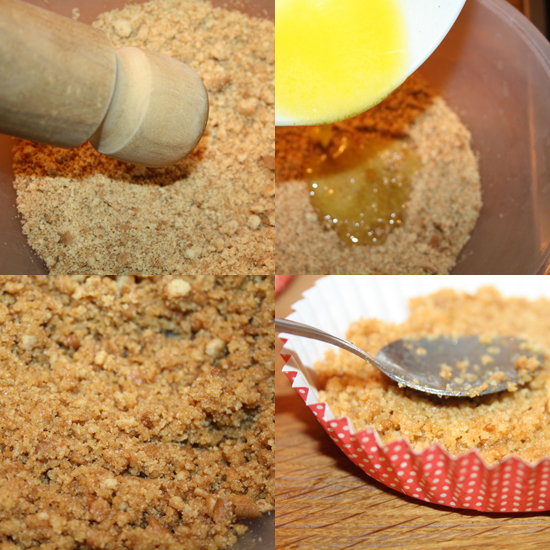
Start by crushing your digestive biscuits into crumbs, I used the end of a rolling pin in a large bowl but you can also pop them into a ziplock bag to prevent flyaway crumbs!
Melt your butter and pour into the biscuit crumbs mixture, then stir until thick and it starts to stick together.
Spoon into your flan cases and press down with the back of a spoon until firm. Place in the fridge to set whilst you make your cheesecake filling.
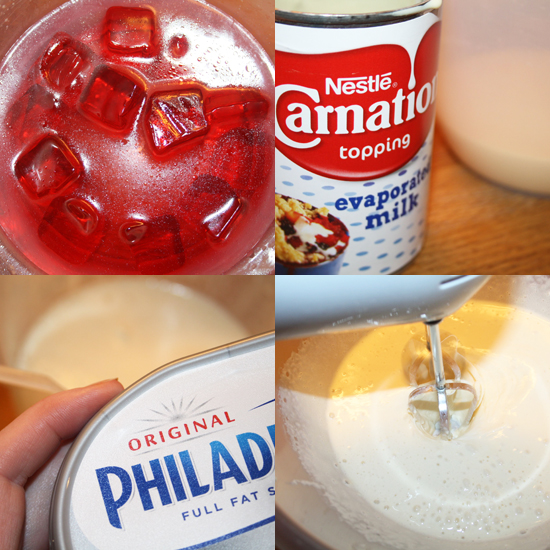
Dissolve your jelly in 65ml of boiling water and set aside to cool (if it doesn’t dissolve after stirring, place it in the microwave for 15 seconds).
Whisk the evaporated milk on a high speed until it has about doubled in size (if you do this in the jug it makes it easier to measure the increase).
Add your Cream Cheese to the evaporated Milk and mix again until well combined.
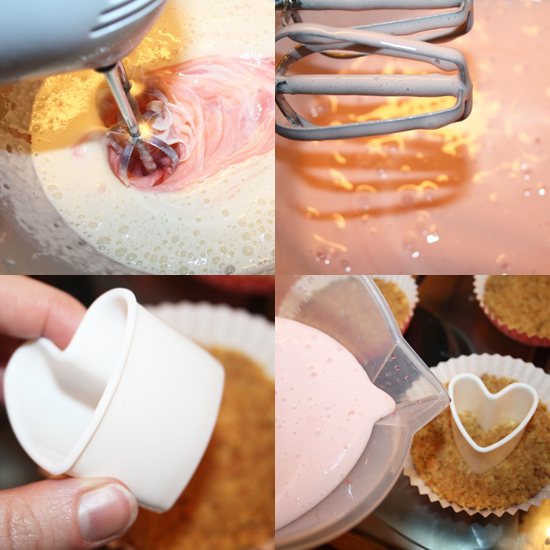
Add the dissolved jelly to the cream cheese mixture and mix until it turns pink.
Remove your cheesecake bases from the fridge and place a heart cookie cutter in the centre of each one, pushing down firmly so the cutter cuts into the base ever so slightly.
*Note: It’s really useful to have more than one cookie cutter, as the mixture takes a little while to set so doing one at a time could be quite time consuming. I have a set of 5 various sized Heart Cutters in my shop for £1.50, I used the 3 smallest sizes.*
Pour the pink cheesecake mixture onto the bases around the outside of the cookie cutters and transfer to the fridge to set for about 25 minutes.
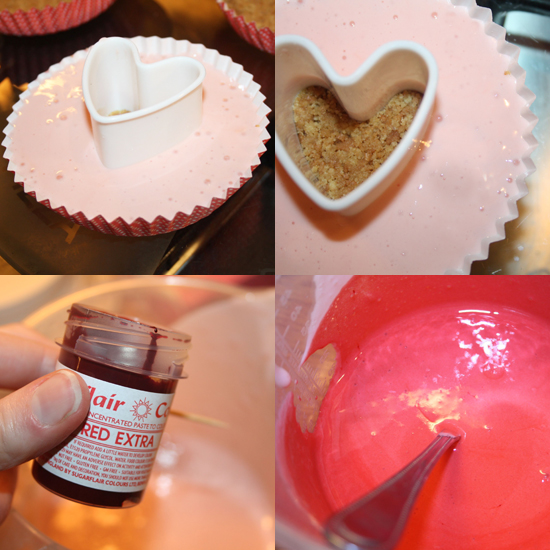
You can make your remaining cheesecake mixture red while you are waiting! I used Red Extra Food Paste, as it means you don’t have to use a lot to get a vibrant red colour. I wouldn’t use a liquid food colour as you won’t get a true red colour and you would need to use a lot of liquid.
Simply dip a cocktail stick into the paste and stir into the pink cheesecake mixture, I did this about 3 times to get a deep red. Stir with a spoon or whisk until the colour is well mixed in.
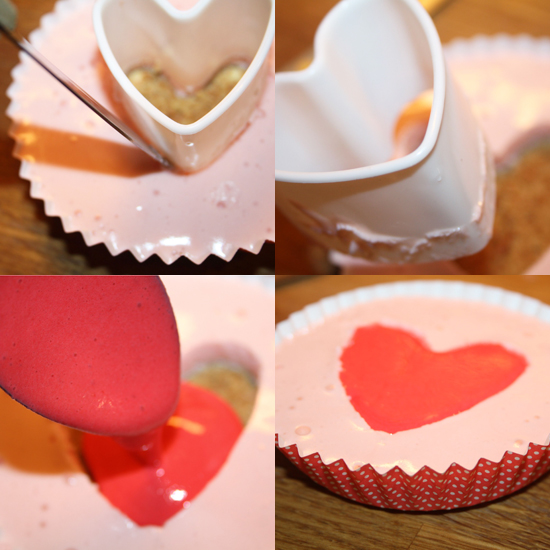
Once your pink cheesecake mixture has set, you need to remove the heart cutters. Run a knife around the edge of the cutter going right down to the biscuit base, then pull the cutter up and you will have a heart shaped gap in your cheesecake.
Pour the red cheesecake mixture into the heart shaped gap and transfer to the fridge to set for a final time.
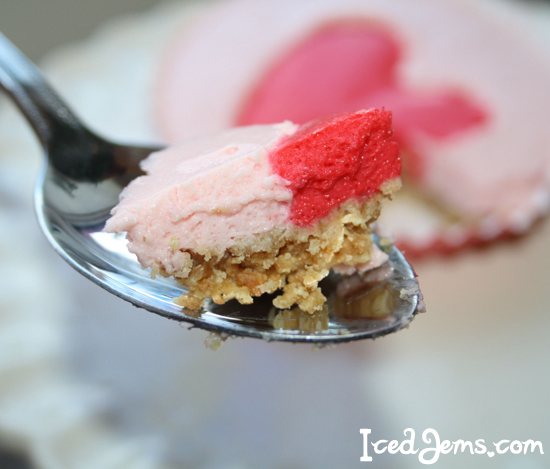
Now simply serve and enjoy! I love how good the different colour cheesecake mixtures look next to each other on a spoon!
Jem x
They look so pretty Jemma 🙂