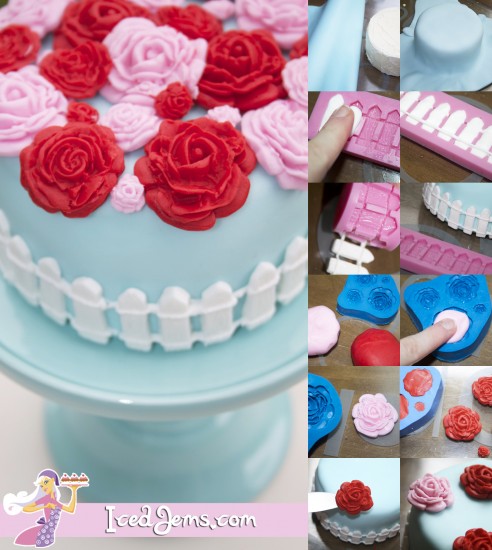
It’s not often that I have the confidence to play around with sugarpaste, but I wanted to try out some of the moulds from my shop and I was very pleasantly surprised with the professional looking results! I took pictures every step of the way so you could have a go too, the tutorial is below.
You will need:
- A 6 inch round cake, lightly covered with frosting / buttercream
- 500g Light Blue Sugarpaste
- 150g Red Sugarpaste
- 150g Pink Sugarpaste
- 150g White Florist Paste (or Sugarpaste mixed with Tylo Powder)
- Edible Glue
- Picket Fence Mould (£6 from www.icedjemsshop.com)
- Roses Mould (£3.99 from www.icedjemsshop.com)
You can grab all the equipment and icing for this cake from my online shop via this link: https://www.icedjemsshop.com/product-category/party-themes/rose-cake/
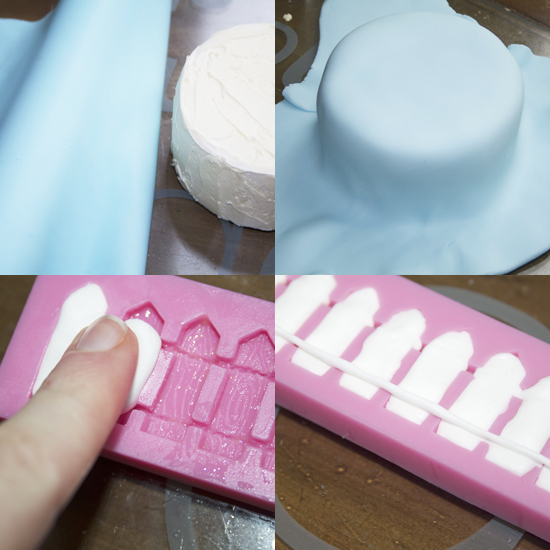
Start by rolling out your blue sugarpaste on a cornflour dusted worksurface to approx 4mm thickness, try to keep the shape to a large circular size if you can for covering the cake.
Fold back the sugarpaste over your rolling pin and lift gently from the work surface and place over your iced cake.
Let the ends of the sugarpaste gently touch the work surface, then start to mould it around your cake shape by smoothing the sides upwards and onto the cake. Continue this the entire way round the cake until smooth, then chop off the excess with a sharp knife.
The picket fence mould has some delicate parts, so I would recommend using florist or modelling paste which are stronger than regular sugarpaste. Spray your mould with a little cake release spray (or you can dust with cornflour) and push small balls of icing into the mould, spreading them out into the edges.
Now roll two long and very thin sausages of white paste to push into the cavity that joins the fence pieces together.
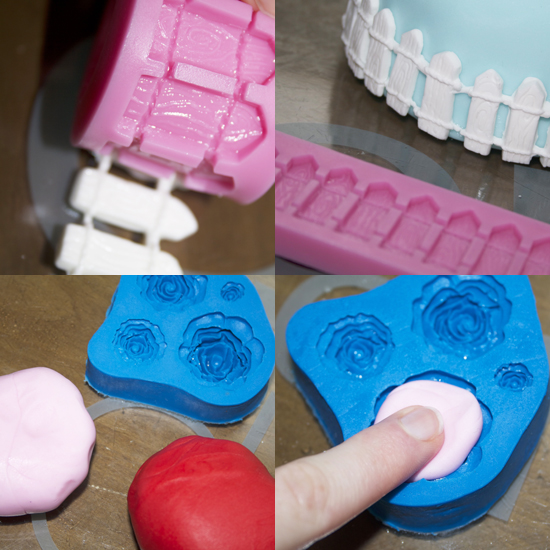
To release your fence, flip the mould over so that it is face down on a flat corn floured surface, then gently peel away the mould leaving the fence behind.
Don’t worry if at this point some of your fence parts break away from each other – you can stick them together when you fix the fence to the cake.
Repeat the fence process a few times until you have enough to go round the bottom circumference of your cake.
Paint a little edible glue around the base of your cake, then gently pick up the fence pieces and push them onto the cake where you have painted the glue. You can use extra glue to stick together pieces that may have fallen apart.
It’s just as easy to make the roses! Grease or flour your Roses Mould and push balls of sugarpaste into the rose cavities, making sure you go right up to the edges.
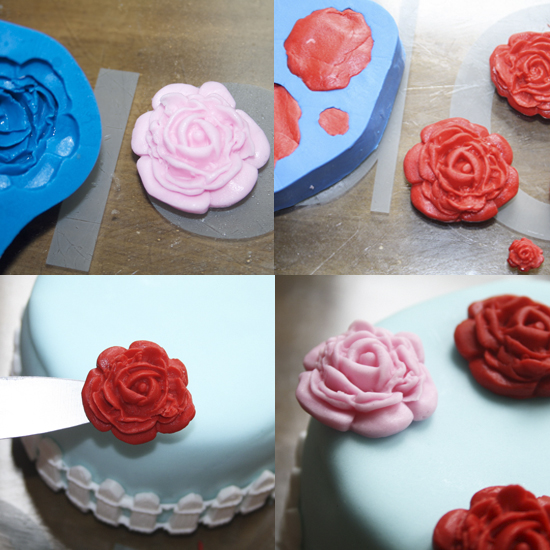
Release the roses by placing the mould face down onto a flat surface and peeling away to leave the pretty roses behind.
The Mould has a variety of sizes, so just make whatever you think looks best for the top of your cake!
Pick up each rose using the end of a large knife and secure to the top of your cake using more edible glue. You can space them however you like, I placed the largest ones down first and it in the smaller ones around them.
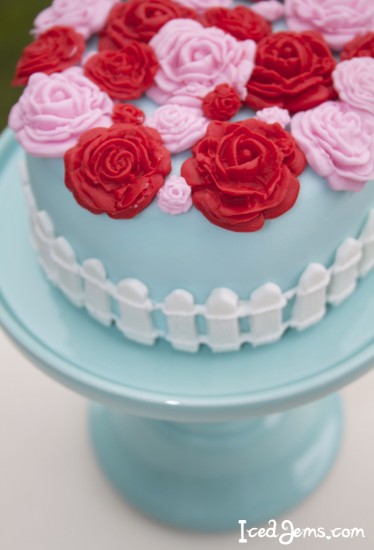
Once all your roses are fixed down, you’re finished! It really is that quick and simple.
Hope you enjoy trying this at home!
Jem x