- A Set Love Embossing Stamps
- A Clear Heart Confetti Cake Topper
- A Heart Frame Mould
- A Mini Hearts Pattern Rolling Pin
- 6 x Heart Arrow Cupcake Toppers
- 10 x Heart Pattern Cello Bags
- Pastel Hearts Sprinkle Mix
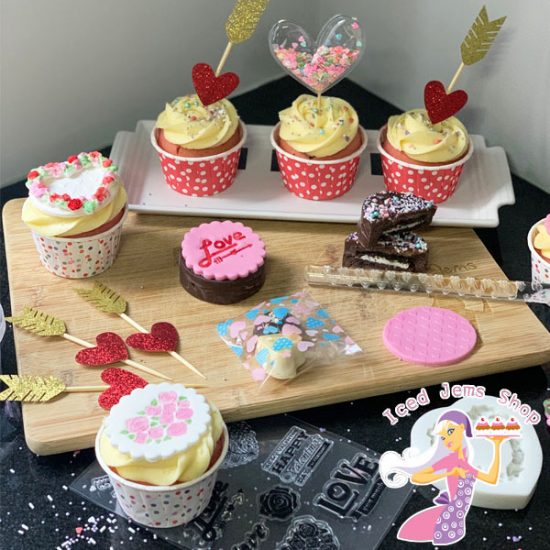
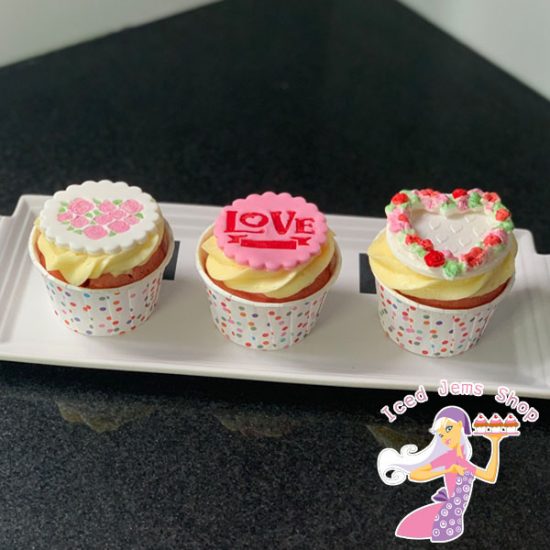
 First up are these gorgeous cupcakes! For the cupcakes themselves just bake them to your favourite recipe and decorate with a swirl of buttercream ready to add the toppers! I actually used our Vegan Cake Mix with these for Veganuary!
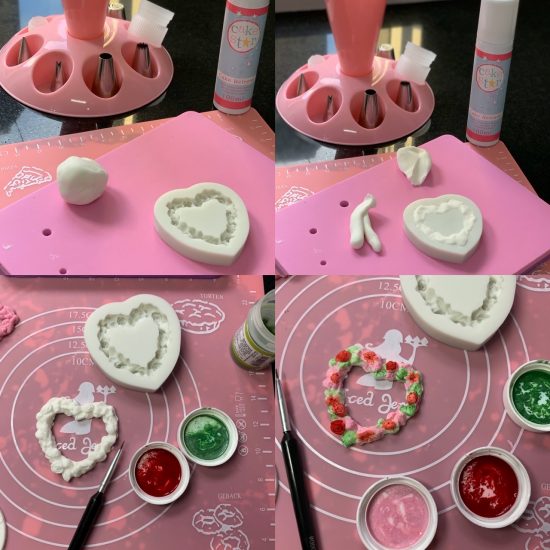
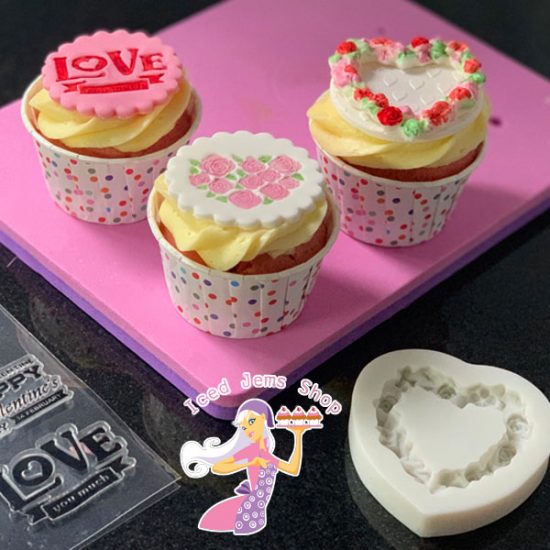
I started by making the floral frame first, as this is best painted when it has had a little time to dry and harden. Spray the mould with a little cake release spray, then roll some white fondant or modelling paste into a thin sausage shape and push into the mould. Flip the mould over face down and gently peel the mould away to reveal your gorgeous edible frame. The decorate, I used the edible dusts we sell in Pink, Red and Green and mixed with a little rejuvenator spirit to make an edible pint with great coverage. Use a fine paint brush to paint in the details and leave to dry.
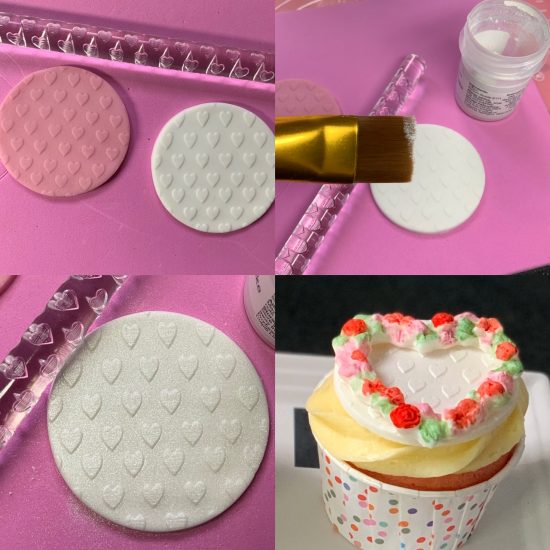
For the base of the topper, I used the super cute Mini Hearts pattern rolling pin (these are so satisfying to use)! Simply roll out sugar paste or modelling paste to approx 4mm thickness, then roll over the patterned pin in a single smooth motion (going back and forth may create lines/ridges). Once happy with your embossed pattern, use a round cutter approx the same size as your cupcake to cut a circle out, then dust with some edible shimmer dust and a dusting brush for a shimmering finish.
Use edible glue to attach the frame to the hearts topper, then place on to of your frosted cupcake!
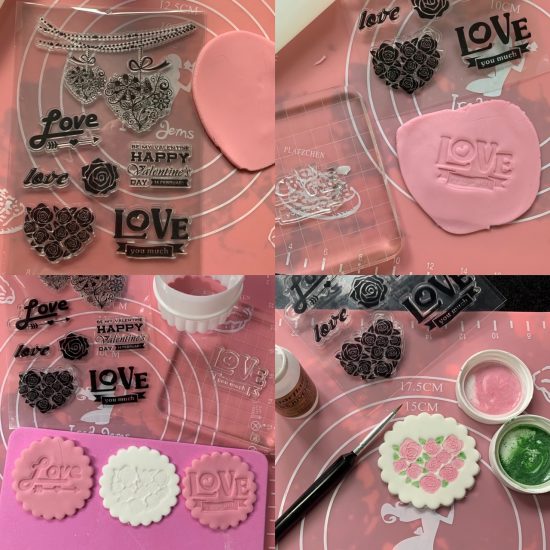
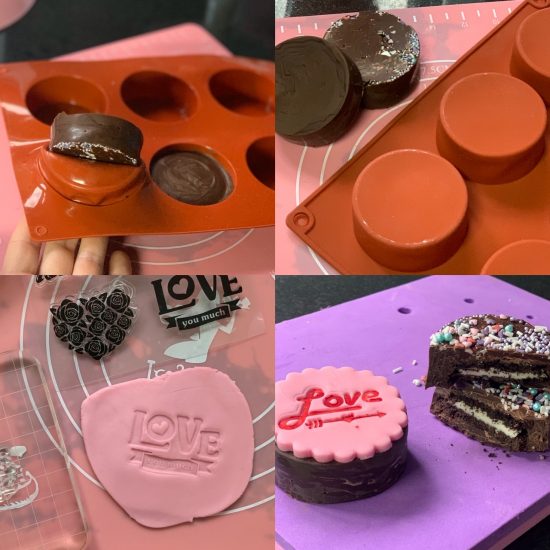
Our embossing stamp sets are so popular thanks to our crazy low prices! We love bringing more out, so could wait to show you this gorgeous Love set! To use the stamp sets, simply peel one of the stamps from the back sheet and place onto an Acrylic Block (it will naturally stick, there’s no need for any adhesive).
Roll out some modelling paste or sugarpaste to approx 4mm thickness, then push the stamp face down into the icing, nice and firm and ensuring you press down on all parts of the stamp. Release to reveal a gorgeous embossed pattern or message.
Use a frilled circle cutter to cut around the embossed pattern you made, then paint in extra detail if you want using edible dusts mixed with rejuvenator spirit for a gorgeous edible paint. Add to your cupcakes for gorgeous toppers, but you can also add to big cakes, cookies, oreos and more! The great thing about these toppers is that you can make them in advance too.
Next up are the fantastic toppers! Perfect for big cake or cupcakes, simply push into your bakes for a fantastic finish with zero effort! I added a swirl of buttercream using a 2D Nozzle and a few of the sprinkles from the pastel hearts mix! 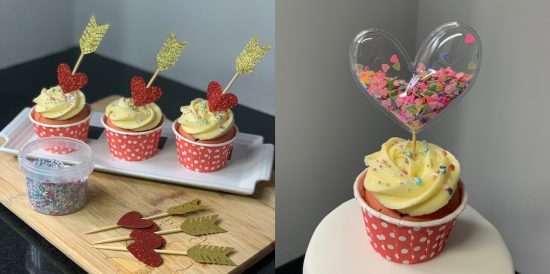
Next up is the tutorial for these delicious chocolate covered oreos! This chocolate covered oreo mould is new to our store and a slightly smaller size than our previous one giving a perfect snug fit for a regular sized oreo without too much chocolate at the sides! You can pour some sprinkles into the bottom of the mould before pouring chocolate in for an easy decoration technique.
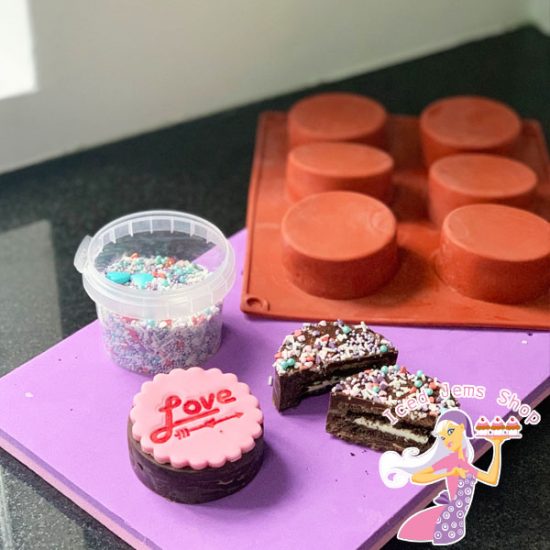
Add melted chocolate to the bottom layer of the mould and use a palette knife to spread up the sides of the mould. Push in an oreo, then fill the rest fo the mould with melted chocolate, tapping the mould on the surface a few times to release any air bubbles. Transfer to the fridge to set.
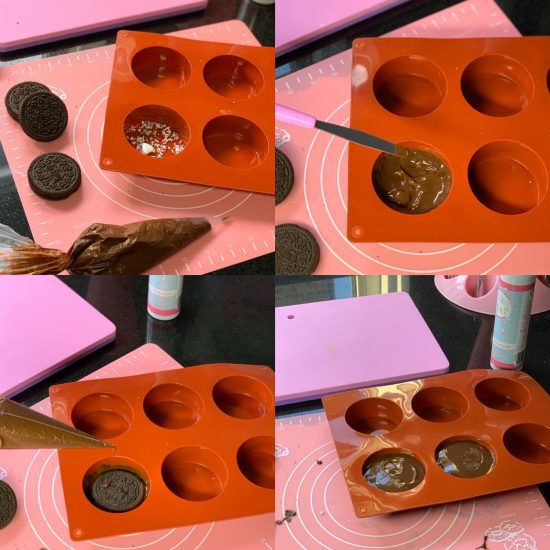
Once set, stretch the mould to release the oreo! You can add extra sprinkles on top if some of yours have disappeared under the chocolate by spreading a little piping gel on top of the oreo then dipping into sprinkles.
If you want to add a bit more detail, you can add a topper like we did for the cupcakes. Below we used another stamp from the Love embossing stamps set and attached to the oreo using edible glue (you could also use melted chocolate)!
I hope you enjoyed some of the inspiration for this months box, all the goodies are also available to buy separately on our website!
Jem x